• Skip to primary navigation
  • Skip to main content
  • Skip to primary sidebar

Living Healthy With Chocolate logo

  • About
  • Recipes
  • Videos
  • Shop
  • Sign up ✉️
menu icon
go to homepage
subscribe
search icon
Homepage link
  • About
  • Recipes
  • Videos
  • Shop
  • Sign up ✉️
    • YouTube
    • Pinterest
    • Instagram
    • Facebook
    • Twitter
    • Email
  • ×

    Home | Recipes | All Desserts

    How to blanch almonds and make almond flour

    By Adriana Harlan | 42 Comments | Published: May 18, 2017 · Modified: Sep 30, 2020

    Recipe Video Reviews
    5 from 15 reviews

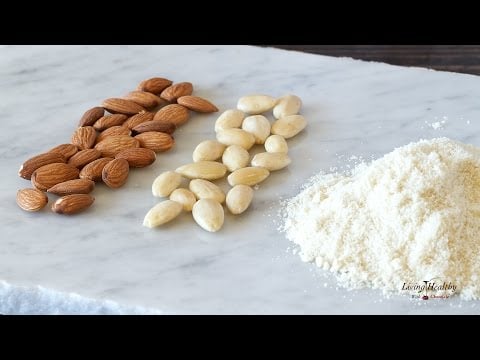
    Today I'm gonna be showing you how to blanch almonds, and how to make your own blanched almond flour at home.

    two piles of almonds and one pile of almond flour to show the stages of how to blanch and how to make almond flour

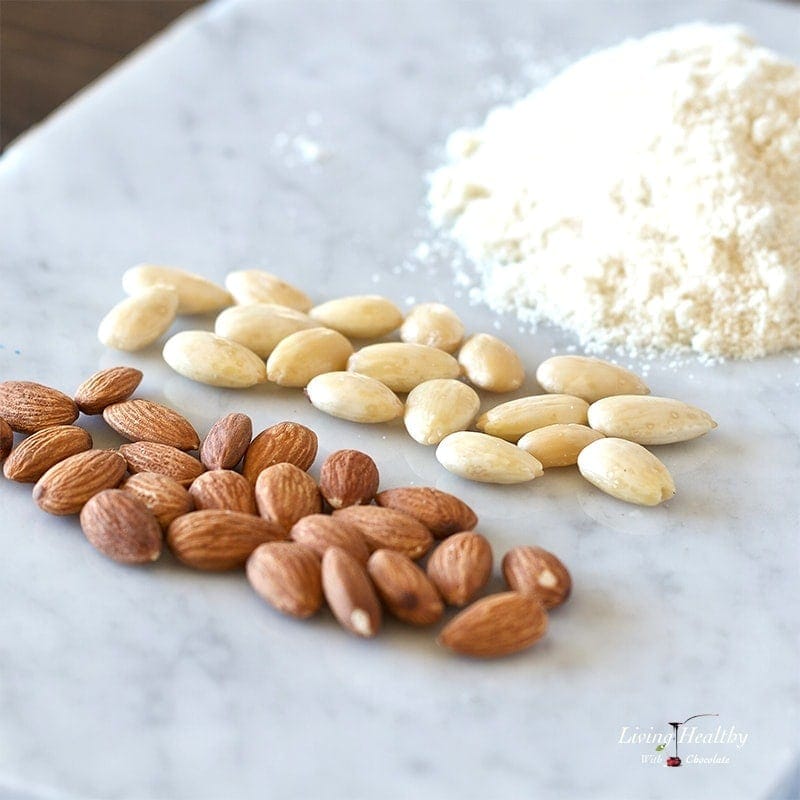
    Blanching almonds means you're taking the skin off the almonds. The process is simple, so be sure to watch my video tutorial above.

    You'll see that once the almonds are soaked in hot water for a few seconds, the skin slips right off when you squeeze them between your fingers. It's so easy to do, and takes no time. But one tip I can give you is to not let your almonds dry out! When they are dry, the skin sticks to the almonds again and you can't easily remove it. If this happens, you need to soak the almonds again to loosen the skin.

    So my best tip is to process them as fine as you can, and then sift the flour through a fine mesh sieve to remove the lager chunks (see in video).

    But you may be asking, why remove the skin off of the almonds to make almond flour?

    The answer is simply because using blanched almond flour in baking gives baked goods a much fluffier and lighter texture. You can bake with regular almond flour, but if you do a comparison, you'll notice the different consistency.

    close up of a glass bowl of almond flour with spatula  sitting on wooden table

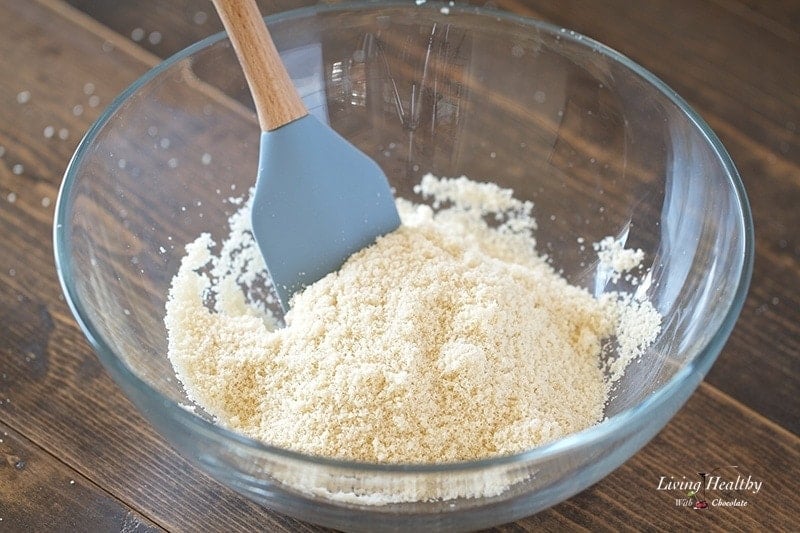
    A final important note I want to make is that it's very hard to grind almonds to fine powder at home, so be sure to sift your flour. Commercial grinders do a better job, but like I always say, not all brands that sell almond flour give you good results in baking. My personal favorite brands are Honeyville, Welbee's, and Blue Diamond.

    Below you can see I made a batch of muffins (recipe here), one using store-bought almond flour and the other using my homemade almond flour. The results are interesting and they both came out tasting delicious and had a great texture.

    two almond flour muffins on marble table showing the difference between store bought and homemade almond flour

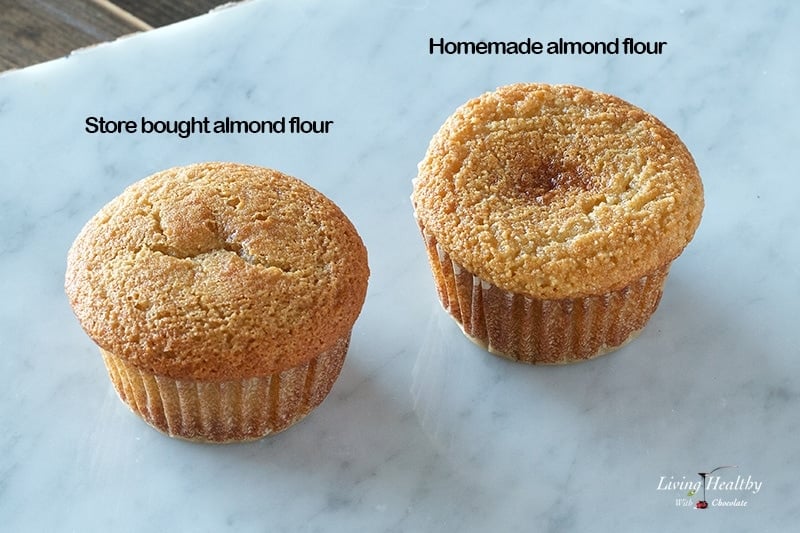
    But there were some differences. As you can see the muffin made with my homemade almond flour is a little flatter on top. The texture inside was similar to the muffin made with store-bought flour, but it was not quite as fluffy. Also the batter was thinner, and seemed to not absorb some of the moisture in the recipe. In the end, both muffins were great, and if you use this method of making blanched almond flour at home, you'll also have good results.

    Hope you give this a try, and after you bake with your homemade flour, please post your photos in the comments below so I can see the results.

    Almond flour recipes to try

    • Peanut Butter Cup Banana Bread
    • Blueberry Bread With Lemon Glaze
    • Zucchini Muffins (Gluten-free, Paleo)
    • Mango Muffins with Coconut-Lime Streusel

    🎥 Watch the recipe video

    How to blanch almonds and make almond flour

    Subscribe to my YouTube channel
    SHARE THIS RECIPE
    Email
    WhatsApp
    Pin
    Share
    Tweet
    Yum

    How to Blanch Almonds and Make Almond Flour

    Print
    Leave a Review
    Add Photo
    5 from 15 reviews
    Recipe by Adriana Harlan
    Servings :1 cup
    Prep :15 mins
    Prevent your screen from going dark

    Ingredients

    • 1 cup whole almonds
    To see the brands I use, click each ingredient above or visit my Amazon shop.

    Instructions
     

    Blanching Almonds:

    • Fill a large pot with water and bring it to a boil. Once the water is boiling, add the almonds and cook for about 30 seconds.
    • Place the almonds in a strainer and run them in cold water to cool them down. Remove the skin of each almond with your fingers. The skin should come right off.
    • Spread the skinless almonds in one layer, in a large cookie sheet, and let them dry in a cool, dark place like your oven or pantry.

    Making Almond Flour:

    • Once your almonds are dry, place them in a food processor and pulse to break them down. Process them as fine as possible, but be careful to not process them too much or they will start to release some of the oils and turn into almond butter.
    • Sift the flour with a fine mesh sieve to remove any larger chunks. Store your almond flour in an airtight container in a cool dark place like your pantry or fridge.

    Notes

    Be sure to watch my video tutorial above 🙂

    Shop Equipment Used

    Food processor
    Food processor

    Nutrition per serving

    Calories: 548kcalProtein: 20gFat: 47gFiber: 11gCarbohydrates: 20gNet Carbs: 9g

    *This post may contain affiliate links and as an Amazon Associate I earn from qualifying purchases. Please read my disclosure policy for more details.

    Made this recipe?Please leave a review and photo in the comments below.
    Email
    WhatsApp
    Pin
    Share
    Tweet
    Yum

    More Healthy Dessert Recipes (Gluten-free, Paleo) 🍩

    • Dark Chocolate Granola (Grain-Free)
    • Strawberry Milkshake (Without Ice Cream or Milk)
    • 30 Healthy Christmas Treats and Desserts
    • Healthy Ginger Cookies (Gluten-free, Paleo)
    Add a comment & photo -Ask questions, share your feedback and photos!
    guest
    Rate this recipe


    YOUR EMAIL ADDRESS WILL NOT BE PUBLISHED

    guest
    Rate this recipe


    YOUR EMAIL ADDRESS WILL NOT BE PUBLISHED

    42 Comments
    Inline Feedbacks
    View all comments

    Primary Sidebar

    About Adriana Harlan
    Hi I'm Adriana, a chocoholic who recreates classic desserts using clean, wholefood ingredients so you can indulge more healthfully. Meet Adriana →

    *Gluten-free, Paleo, Vegan dessert recipes*

    Valentine’s Day Recipes

    • Molten Lava Brownies (Cake)
      Cook Time27 Minutes
    • Vanilla Sandwich Cookies
      Cook Time35 Minutes
    • Strawberry Milkshake (Without Ice Cream or Milk)
      Cook Time3 Minutes
    • Chocolate-Strawberry Crumble Bars
      Cook Time53 Minutes

    Latest Recipes

    • Dark Chocolate Granola (Grain-Free)
    • Flourless Chocolate Chip Cookies
    • Orange Cake (GF, Paleo, Keto)
    • Almond Flour Banana Muffins

    Most Popular Recipes

    • Healthy Shepherd's Pie Recipe (low-carb, paleo, whole30)
    • Paleo Chocolate Cake
    • Easy Brazilian Cheese Bread Recipe (Pão de Queijo)
    • Mango Smoothie | Easy 3-Ingredients (without yogurt)

    My Cookbook

    Paleo Desserts for Dummies cookbook cover

    As seen on

    As featured on living healthy with chocolate

    Explore Recipes

    By category: All desserts | Brownies | Breads | Cakes & Pies | Cookies | Chocolates | Ice Cream | Muffins & Cupcakes | Jams & Nut butters | Drinks | Healthy snacks | Sauces

    By diet: Paleo | Gluten free | Dairy free | Egg free | Nut free | Low carb & Keto | Vegan | Vegetarian | Whole30

    Footer

    Featured on:

    featured on banner living healthy with chocolate

    ↑ back to top

    • About Adriana | About the blog
    • Contact
    • Brand Partnerships
    • Affiliates
    • Instagram | Facebook | Youtube | Pinterest

    ✉️ Newsletter

    Get my best recipes and tips in your inbox.

    Sign up now

    ☕️ Buy me a tea

    Donate a tip so I can keep creating great recipes.

    Donate

    Copyright © 2023 Living Healthy With Chocolate. Privacy Policy | Disclosure | Accessibility

    Website designed and developed by Adriana Harlan ♥